Dishwashers, no matter how durable, costly, or high-quality they are, do not last indefinitely. When they finally break down or need to be replaced, you’ll have to figure out how to get rid of them, which may be a complicated process if your dishwasher is integrated, which means it is incorporated into the rest of your kitchen.
Fortunately, our white goods disposal team has years of experience and has put together this straightforward advice on removing a built-in dishwasher to help the procedure go as smoothly as possible.
How to disconnect an integrated dishwasher
1. Remove the unit
Check to see if there are any wheels beneath the integrated dishwasher before sliding it out. You risk inflicting damages to your kitchen floor if you don’t use sliders or rollers.
If no rollers are attached, you can get it out using furniture sliders instead, but be cautious not to pull it out too far, since it should not extend past the length of the hose connections.
We also recommend using a towel or any soft cloth as a buffer between the unit and the flooring to prevent further damage to the floor.
2. Turn off the electricity and the water supply
You must first switch off the power before proceeding to the next stage. Because integrated dishwashers are often hard-wired, you may not be able to simply disconnect a cord. Instead, cut off the power at the main electrical panel to avoid electricity from being mistakenly turned on.
After you’ve turned off the electricity, turn off the water supply as well. You can do this by locating the shut-off valve, usually found in the cabinet behind the sink. You should then turn off the valve (if your valve is leaking or corroded, you may want to turn off the main water supply).
3. Remove the screws from the countertop
After that, remove the screws on the front of the machine and attach the dishwasher to the countertop above it. You’ll be able to carefully unhook and remove the dishwasher from the countertop after they have been removed.
You should place a towel or cardboard in front of the dishwasher to protect the floor when you remove it.
4. Remove the lid from the junction box
After that, you’ll need to remove the box junction’s cover to gain access to the wire required for the next steps. The junction box is an electrical box with a material covering it. This is most frequently located on the dishwasher’s lower rear region, and you’ll need to remove the surface material to reveal different wire nuts that link the dishwasher’s black and white wires directly to the power supply.
5. Remove and unplug some cables and pipes
With several green-coloured screws, a bare ground wire will be connected to the box. Use a voltage tester and disconnect the wiring to check that the circuit is completely turned off before removing the wires and cables. Then, when you remove the electrical cable from the junction box, put wire nuts on the ends of each of the various wires and move them out of the way.
These pipes will also need to be unplugged to allow you to remove your integrated dishwasher:
- The hot water supply pipe and power supply line (usually located slightly above the floor, below the unit
- The discharge line
6. Loosen the compression fitting
You’ll need to relax the compression fitting now that you’ve detached those pipes. To do so, you need to remove the access panel that covers it, which will just involve unscrewing a few screws.
After that, carefully remove the compression fitting with pliers or an open-end box wrench, wiping up any leaking water as you go.
7. Disconnect the water line
Locate the water inlet beneath the dishwasher and remove the nut while securely keeping the inlet in place. Some of the water that remains in the pipes may seep out when you remove the water line so have a towel and bucket ready.
8. Remove the drain line
Next, you’ll need to detach/disconnect the drain line. Clamps are commonly used to keep this in place, so you can just loosen these using whatever tool you have handy.
9. Get rid of the remaining water
Make sure there is no water trapped within your dishwasher before getting rid of it or transporting it. This will not only create moisture and dirt buildup, but it will also leak.
Place the hose ends of the line into a bucket and allow it to drain out slowly. This process may take some time, so it’s a perfect opportunity for a break.
To make this job even easier newer models of integrated dishwashers include a tiny drainage device at the rear.
What not to do when removing an integrated dishwasher
- Tip the dishwasher to get the water out quickly – This can be incredibly messy and harm the machine.
- Remove without disconnecting the lines – Doing this will either damage the framework of your kitchen or cause a leak. The last thing you want when removing an integrated dishwasher is a flood of water seeping out.
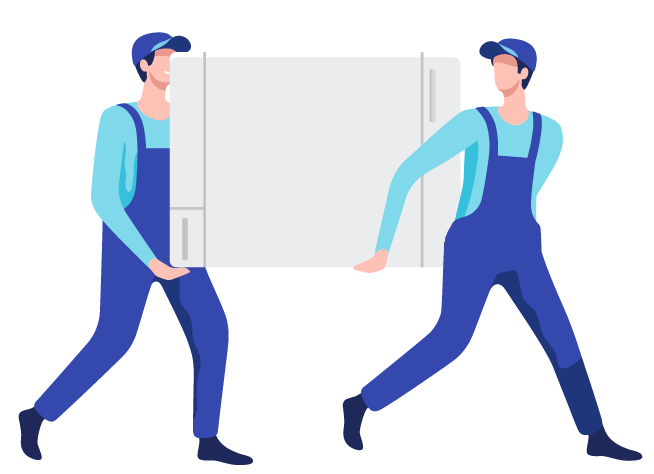
- Do it on your own – Dishwashers can be very heavy, so it is not good to try and remove them on your own. If you do it without a partner, then you risk injuring yourself and damaging your home.
Where to get rid of an integrated dishwasher
You must now determine what to do with the dishwasher, which has been unplugged, drained, and isolated from the kitchen countertops. Dishwashers, like white goods and WEEE waste, need particular disposal and recycling techniques, which is why we recommend enlisting the aid of a professional waste management company.
- Same-day white-goods removal services, you won’t need to worry about where you’ll store your old integrated dishwasher once you’ve removed it.
- The confidence that your old dishwasher will be responsibly and ethically disposed of in accordance with white goods disposal laws.
- Waste disposal teams that are quick, efficient, and dependable.
- Reasonable and fixed costs.
- Free, no-obligation quotations.
Contact us to find out more about our white goods removal services or to arrange a booking.